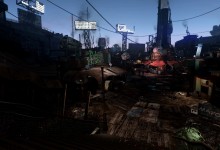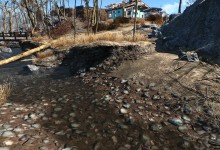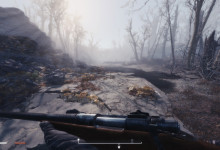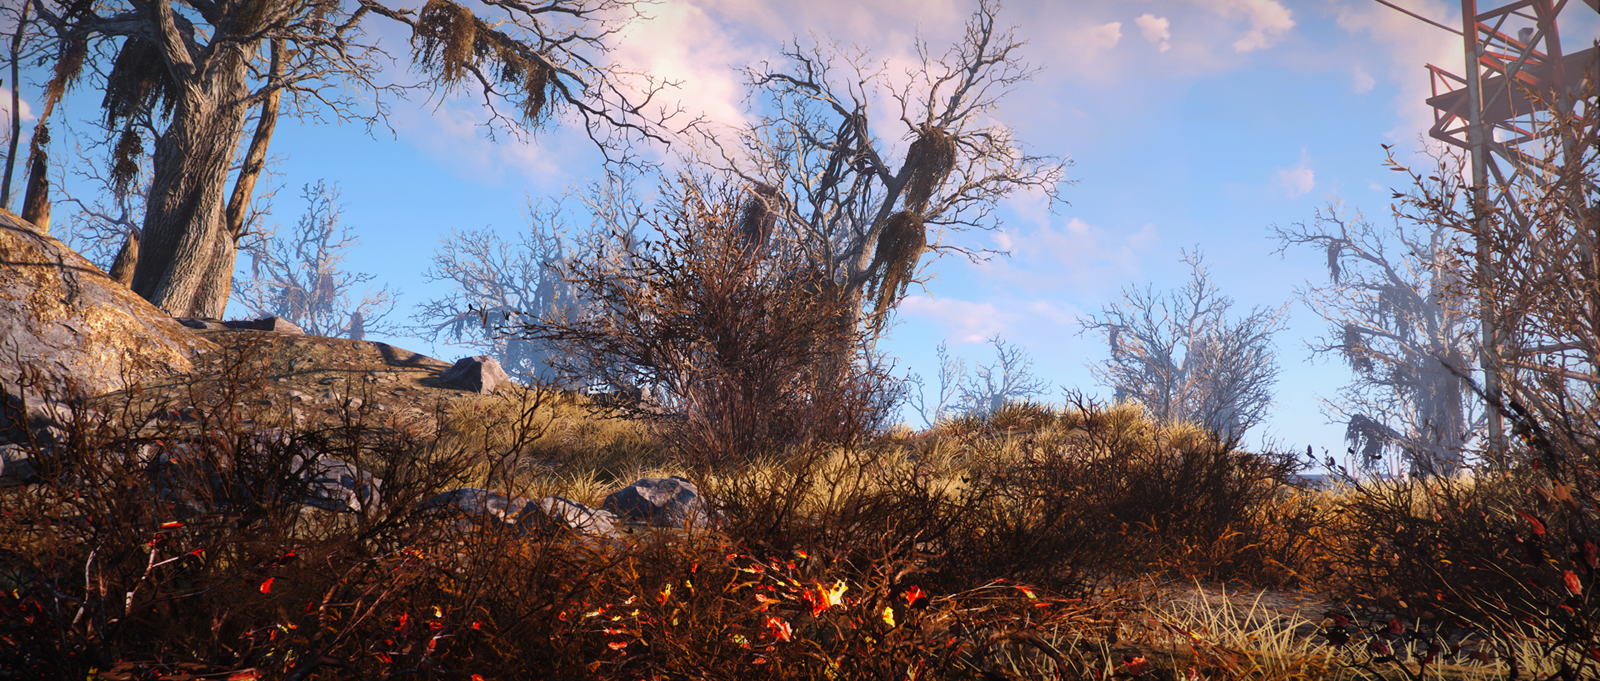
Commonwealth Revitalised is a mod that uses post-processing effects to produce more vibrant, crisper and deeper visuals with a minimal impact on performance. Colours are no longer washed out, dark areas are darker, bright areas are brighter, banding is significantly reduced, interiors and exteriors are appropriately lit, textures are sharper, and the wasteland, as a whole, now feels more alive.
This preset might be what you’re looking for if you’ve been seeking improved graphics but are tired of presets that suffer from extreme saturation, pitch black nights, blinding bloom, overblown whites, crushed blacks, eye-melting chromatic aberration, and other effects that drastically alter the look of the game. This preset is more subtle, while at the same time making the Commonwealth feel significantly more vivid by bringing out colours and contrast that match the original vision of the game.
SHADERS USED
Deband
Levels
DPX
Lift gamma gain
Vibrance
Vignette
Dither
Lumasharpen
FXAA
HDR
Reinhard
Grain
Additional shaders (Wish You Were Here version):
Ambient occlusion (SSGI)
YACA (radial chromatic aberration)
REQUIREMENTS
All you need is an installed copy of the ReShade Framework and a working, legal copy of Fallout 4. As far as hardware goes, your graphics card will be the deciding factor with this mod. I suggest having at least a GTX 670 (Nvidia) or a Radeon 7950 (AMD). If you can run the game relatively well, you shouldn’t have any issues with Commonwealth Revitalised, but while I’ve done my best to keep the performance impact as low as possible, you should expect to lose a handful of frames per second. If you’re struggling to keep the game playable, I would advise against using the mod – but if you’re unsure, it can’t hurt to try.
INSTALLATION INSTRUCTIONS
Download and install the ReShade Framework following its own instructions.
Commonwealth Revitalised cannot be installed through a mod manager, so you’ll have to download the mod manually. Pick either the normal version or the WYWH version, which uses ambient occlusion (buggy) and chromatic aberration. I recommend using WYWH exclusively for screenshots, and the normal version for regular gameplay. If you know what you’re doing, you can activate both of these shaders manually in the normal version. I’ve provided an alternate edition simply for the people who don’t know how to edit ReShade presets. Please note that the WYWH version may have a significant impact on performance due to the ambient occlusion shader, which will also “bleed” through fog. Again, I recommend using WYWH only for screenshots.
Extract the ReShade folder (not its contents, but the folder itself) from the Commonwealth Revitalised download into your main Fallout 4 directory (you should be seeing dxgi.dll and Fallout4.exe). Overwrite the existing ReShade folder and its contents when prompted.
And that’s it! Press your Scroll Lock button to toggle the mod on/off. If you’re using the WYWH version, you can toggle ambient occlusion on/off with the Insert key, and chromatic aberration on/off with the Home key.
UNINSTALLATION INSTRUCTIONS
If you want to uninstall the mod (hey, we all make mistakes) simply remove the files from your Fallout 4 folder.
If you can’t be bothered removing all of the files or just want to disable the mod temporarily, you can just rename or delete dxgi.dll and it’ll have the same effect.
FAQ
This mod does more damage to my framerate than a deathclaw to my settlers. Is that normal? How do I get better performance?
While I’ve done my best to optimise Commonwealth Revitalised as much as possible, there is only so much your hardware can do. On my GTX 970, at 1080p and with no overclock, I lose between 2 and 5 FPS in most cases, so it’s a pretty lightweight mod if you have modern hardware. Check the requirements section above for more information. If you’re getting abnormally low framerates on good hardware (like, say, your FPS have been chopped in half) make sure you have vertical synchronisation either off, or turned on with a triple buffer – you can force either setting from your graphics card’s control panel. If you really want to use the mod and are willing to trade visual fidelity for performance, I’d recommend using the normal version and turning off the HDR and vignette shaders.
Help – my game is crashing!
If you’re experiencing any kind of crashing issues, try turning off all overlays. Start with the more obvious ones (bloatware overlays, FPS counters, etc) and if none of them work try disabling the Steam overlay.
My game doesn’t look exactly like yours. What gives?
Fallout 4 is an immensely complex and unpredictable work, and you’re not very likely to replicate the exact same fog, weather and time of day conditions that you see in my screenshots. The exact same location can look radically different even if you just wait around for an hour. Moreover, my screenshots have all been taken at 4K and downsampled, so image quality is obviously going to be better than what you’ll get at 1080p. Apart from those variables, your monitor can actually make a big difference: make sure your screen is calibrated properly and, most importantly, check you’re not using a custom Windows colour profile. If your game looks really bizarre and not at all like any of my screenshots, there may be something else that’s wrong – post in the comments and I’ll try to help.
I’m a heretic and want to make a few tweaks to your life-changing work. How would I do that?
All you need is Notepad (although I recommend using Notepad++ instead). Commonwealth Revitalised is just a collection of shaders and settings for them contained within plain text files. Feel free to edit away at your heart’s content. There aren’t any comprehensive guides for all of the shaders, so you’ll have to resort to trial and error most of the time. If you like your variant enough to share it, please ask me for permission before you do so.
Can I suggest changes?
Yes, but the changes Commonwealth Revitalised makes were determined based on a very specific vision I had for the mod. While your suggestions are appreciated, I won’t necessarily implement them. After all, the quality of mods like this is pretty much completely subjective; I developed it with my own tastes in mind, so if I personally disagree with your suggestion, unfortunately I won’t be adding your suggestions to the mod.
How do I take screenshots with the mod enabled?
Steam’s screenshot tool doesn’t capture post-process injectors like ReShade, so you’ll need a third party program to do so. I personally use MSI Afterburner, mainly because it allows you to take uncompressed screenshots, works with pretty much anything, and is a tiny part of a huge program with tonnes of useful hardware monitoring features. If you want something more simple, Fraps ought to do the job. If you’re interested in improving your screenshots, look up some basic photography guides, as the principles of photography and screenshotting are identical. My advice is to learn how to use the rule of thirds, framing and cropping – mastering those techniques will allow you to produce wallpaper-worthy art. Practice makes perfect, so keep at it, git gud, and make sure to share your best screenshots!
If you’ve downloaded this mod, thank you very much – don’t hesitate to leave feedback, and if you enjoy it, feel free to endorse it and all of that jazz. Massive thanks, and 99.9% of the credit for this mod, goes to the ReShade team and the authors of all the shaders. Thanks again!